The thoracic spine consists of twelve vertebrae in your upper and middle back. Each of these vertebrae connects to a rib. This section of your skeleton protects your heart and lungs, and it provides a base for your neck and shoulders. When you sit at a desk, your body holds a fixed shape for hours. Your shoulders roll forward, your head shifts past your collarbones, and your mid-back rounds toward the computer screen.
Over time, the tissues adapt to this position. Ligaments shorten, muscles stay locked in a stretched state, and the joints lose their ability to extend backward or rotate side to side. When the mid-back stops moving, the lower back and the neck take on extra motion to compensate. Restoring mobility to the thoracic spine relieves that stress. You do not need complex gym gear for this work. A standard foam roller, a floor mat, and ten minutes of targeted movement will change how your back functions.
Why the mid-back stiffens during desk work
The thoracic spine has a natural outward curve called kyphosis. Sitting in a chair amplifies this curve. When you lean forward to type or look at a monitor, gravity pushes your chest down toward your pelvis. Your rib cage drops, and the front of your chest compresses. The muscles between your shoulder blades, including the rhomboids and middle trapezius, remain under constant low-grade tension without actually contracting through a full range of motion. This state is called muscular creep. The tissues deform under continuous load, and the nervous system learns to accept this slump as your baseline posture.
Joint capsules also respond to stillness. Synovial fluid lubricates the facet joints between each vertebra. When you sit without twisting or arching your back, this fluid thickens and joint nutrition decreases. The costovertebral joints, where your ribs attach to your spine, stiffen as well. As a result, your rib cage stops expanding fully when you breathe. Shallow breathing locks the rib cage into a depressed position, which reinforces the rounded mid-back.
This stiffness creates mechanical problems further up and down the chain. Your neck must bend backward at the upper cervical joints so your eyes can look straight ahead at the screen. That creates tension at the base of the skull. Below the mid-back, your lumbar spine often rounds flat or overextends to balance your center of mass. Restoring thoracic mobility removes the root cause of these compensations.
| Spinal Segment | Primary Intended Motion | Sedentary Compensation |
|---|---|---|
| Cervical (Neck) | Rotation and controlled flexion | Forward head shift and hyperextension |
| Thoracic (Mid-back) | Extension and rotation | Excessive rounding (hyperkyphosis) and joint lock |
| Lumbar (Low back) | Stability and limited flexion | Excessive arching or flattening under load |
Foam roller extension technique and rib cage bracing
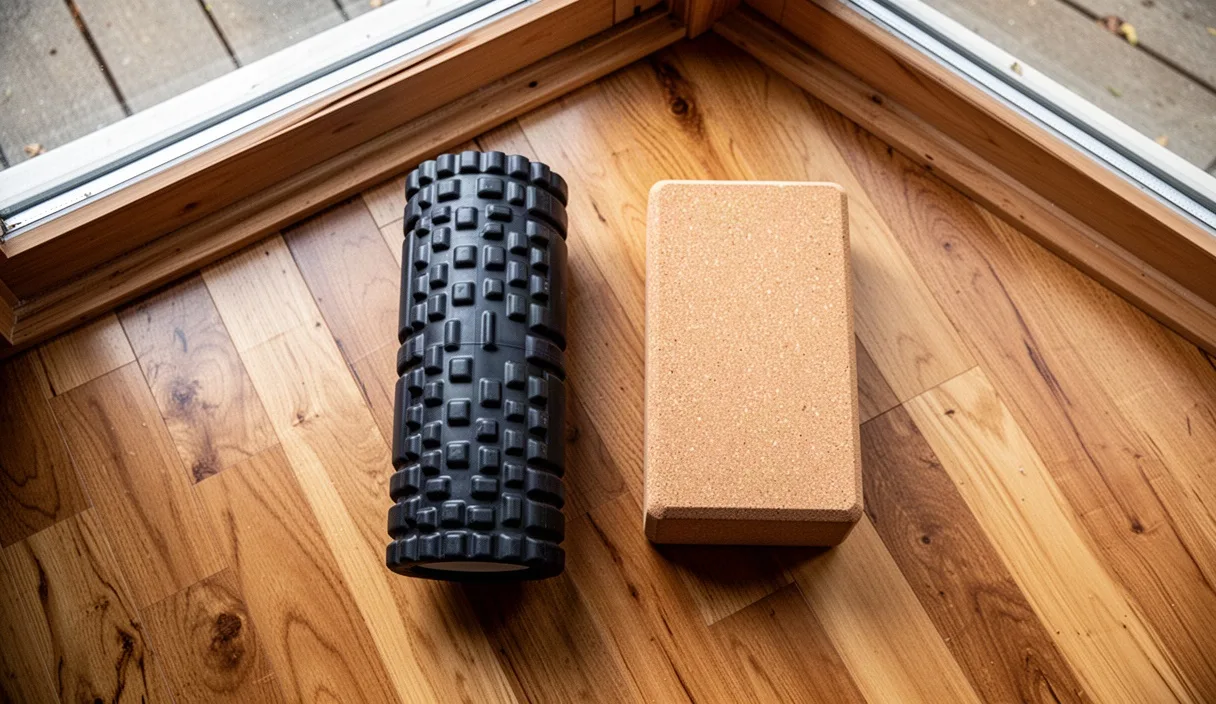
A standard 36-inch high-density foam roller with a 6-inch diameter is the best tool for thoracic extension. Softer rollers compress too much under body weight, while textured or vibrating rollers add unnecessary complexity. The goal of this drill is to create a fulcrum under specific thoracic segments so the vertebrae can pivot backward into extension. You must not turn this into a lower back exercise.
The most common error on a foam roller is arching the lower back instead of the mid-back. The lumbar spine naturally extends with ease, so your body will try to move there first. To stop this, you must brace your rib cage. Pull your bottom ribs down toward your hip bones by contracting your abdominal wall. Imagine you are preparing to take a light punch to the stomach. Keep that tension throughout the drill.
Position the roller
Sit on the floor with your knees bent at 90 degrees and your feet flat on the ground. Place the foam roller horizontally behind you. Lean back so the roller rests across the lower portion of your shoulder blades, roughly level with the bottom of your sternum. Keep your buttocks on the floor.
Support the head
Interlace your fingers and place your hands behind your head at the base of the skull. Point your elbows toward the ceiling rather than flaring them out to the sides. This elbow position moves your shoulder blades outward, exposing the thoracic vertebrae to the roller. Your hands support the weight of your head so your neck muscles do not strain.
Execute the extension
Take a normal breath in. As you exhale, slowly let your upper back arch backward over the roller. Move only from the mid-back. Keep your lower ribs pulled down and your hips firmly on the floor. Pause at the bottom of the movement for three seconds. Inhale as you return to the starting position. Perform four repetitions at this spot. Then, slide your body down two inches so the roller moves higher up your back, toward the tops of your shoulder blades. Repeat the four extensions. Work across three or four distinct segments, but never roll onto the lower back or the neck.
Side-lying thoracic rotations for shoulder comfort
The thoracic spine is built for rotation. Each thoracic vertebra has facet joints angled to allow the upper body to twist. Sitting facing forward all day removes rotation entirely. When the mid-back cannot twist, the shoulder joint suffers. Reaching across your body or behind your back starts to pinch the tendons of the rotator cuff. The side-lying rotation, often called the open book drill, restores rotational range without placing load on the shoulders.
You need a flat floor and a foam roller or firm yoga block to lock your pelvis in place. If your pelvis twists along with your chest, you rotate through your lumbar spine and your hip joint rather than your mid-back. Isolating the thoracic spine requires keeping the hips stacked vertically throughout the drill.
Set the starting posture
Lie on your right side. Stack your knees and bend your hips and knees to 90-degree angles. Place the foam roller lengthwise on the floor in front of you, parallel to your torso. Rest your left knee and shin on top of the roller. Extend your right arm straight along the floor, perpendicular to your torso, and rest your head on a small pillow or folded towel. Place your left hand on top of your right hand.
Lock the pelvis
Press your left knee down into the foam roller with moderate pressure. Maintain this downward pressure for the entire set. If your top knee lifts off the roller as you twist, you have rotated your lower back. The roller gives you immediate feedback: keep the knee glued to it.
Rotate through the ribs
Inhale to prepare. As you exhale, lift your left arm toward the ceiling and continue moving it toward the floor behind your back. Turn your head and rib cage to follow your hand. Let your eyes track your left thumb. Go only as far as you can while keeping your left knee pressed firmly onto the foam roller. Stop when you feel tension across your mid-back and chest, or when your knee threatens to lift. Hold that end position for two full breaths. Exhale as you return your left hand to meet the right hand. Complete eight smooth repetitions on the right side, then flip your body and complete eight repetitions on the left side.
Breathing mechanics while maintaining spinal extension
Breathing is a mechanical event that directly influences spinal stiffness. The diaphragm sits inside the lower rib cage. When you inhale properly, the diaphragm contracts downward, and the ribs expand outward in all directions: front, sides, and back. When you slouch, the front of the rib cage compresses, preventing this expansion. People compensate by using neck muscles like the scalenes and sternocleidomastoid to pull the collarbones upward on every inhale.
To break this habit, you must learn to expand the rib cage laterally and posteriorly while your spine is in neutral or slight extension. This restores the gliding motion between the ribs and the vertebrae. Breathing exercises paired with spinal drills double their effectiveness.
Practice this technique while seated upright on a firm chair or sitting tall on the floor. Place your hands on the sides of your rib cage, fingers pointing forward and thumbs wrapping around toward your back.
- The Inhale: Breathe in quietly through your nose for a count of four seconds. Direct the air into your hands. Do not allow your shoulders to rise toward your ears. Feel your ribs push your hands outward to the sides and backward into your thumbs. Your chest should expand, not lift.
- The Pause: Hold the air for two seconds without closing your throat. Maintain the outward pressure against your ribs.
- The Exhale: Exhale slowly through pursed lips for a count of six seconds. As the air leaves your lungs, feel your rib cage slide downward and inward. Gently pull your navel toward your spine at the very end of the exhale to empty the lungs completely.
- The Reset: Pause for one second with empty lungs before taking the next breath. Repeat this cycle for ten rounds.
This 4-2-6 breathing cadence forces the parasympathetic nervous system to down-regulate muscle tone. The muscles along your spine release resting tension, allowing the joints to settle into proper alignment.
A five-minute morning maintenance sequence
A mobility drill works best when repeated daily. Five focused minutes every morning creates lasting tissue changes faster than a single sixty-minute session on the weekend. Perform this sequence on a carpeted floor or yoga mat before you sit down for your first work block.
Minute 0:00 to 1:30: Foam Roller Segmental Extensions
Take your position on the roller. Support your head with both hands. Spend 30 seconds at the lower thoracic spine, performing four slow extensions with braced ribs. Move the roller up two inches to the mid-thoracic spine for 30 seconds. Finish with 30 seconds at the upper thoracic spine, right between the shoulder blades. Keep your hips grounded the entire time.
Minute 1:30 to 3:30: Side-Lying Rotations
Move the roller alongside your body. Lie on your right side with your left knee anchored to the roller. Spend 60 seconds performing eight deliberate open-book rotations. Hold the final repetition at the end range for five seconds. Turn over to your left side and spend 60 seconds performing eight rotations with your right arm moving across your body. Keep your anchored knee heavy on the roller.
Minute 3:30 to 5:00: Quadruped Thoracic Thread and Reach
Get onto your hands and knees. Place your hands directly under your shoulders and your knees directly under your hips. Keep your toes tucked. Place your left hand behind your head with the elbow pointed out to the side.
- Rotate your upper body downward, bringing your left elbow toward your right wrist. Exhale as you twist down.
- Reverse the motion. Push the floor away with your right hand and rotate your left elbow up toward the ceiling. Inhale as you open your chest. Keep your hips square to the floor. Do not let your pelvis sway to the left.
- Perform six slow repetitions on the left side over 45 seconds.
- Switch sides. Place your right hand behind your head and perform six slow repetitions on the right side over the remaining 45 seconds.
Common mistakes
Small errors in execution will direct movement away from the mid-back and into the more mobile sections of your spine. Watch for these four common errors.
- Hinging through the lower back: This happens most often during foam roller extensions. If your belly rises toward the ceiling or your lower back arches off the floor, you have lost your rib cage brace. Keep your abdomen firm and move only the ribs and upper spine.
- Pulling on the neck: When supporting your head on the roller, your arms are a hammock for your skull. Do not yank your chin toward your chest. Keep your neck in line with your upper back throughout the movement.
- Lifting the knee during rotations: In the side-lying drill, lifting the top knee means your pelvis is turning. That shifts the twist into your lumbar spine and hip joint. If your knee starts to lift, you have gone past your thoracic range. Reduce the rotation until the knee stays flat on the roller.
- Holding your breath: Many people hold their breath when a joint feels stiff. Holding your breath increases internal pressure and tenses the surrounding muscles, which blocks movement. Exhale during the hardest part of every extension and rotation.
Practical next steps
Do this five-minute sequence every morning for fourteen consecutive days. You should notice that sitting upright feels less tiring by the end of the second week. Your shoulders will naturally sit further back on your rib cage without conscious effort to pull them together.
During the workday, set a timer to stand up every 45 to 60 minutes. Stand tall, place your hands on the back of your hips, pull your ribs down, and take three deep breaths using the lateral expansion technique. This micro-break resets tissue creep before it locks in.
If you experience sharp pain, numbness, tingling down your arms, or pain that radiates into your ribs during these drills, stop immediately. These drills are designed for muscular stiffness and postural adaptation. They are not a treatment for disc herniations, structural scoliosis, or acute joint injuries. If you have a history of spinal conditions or cellular vitality, consult a licensed physical therapist or orthopedic physician before using a foam roller on your spine.